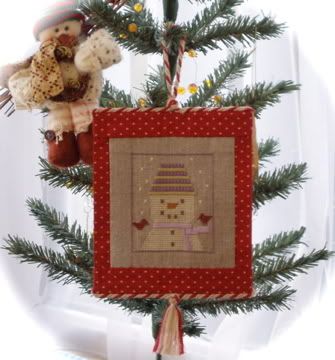
Below you will find the instructions for the NO SEW Wallhanging finish...
I am sure you are going to really enjoy this so very easy but very effective finish. Remember your list of materials/tools is above ...just so that you can check you have everything with you ;) Good, now all we need is to have some good fun, a bit of time, lots of patience and an ability to use an iron.
I am posting the step by step instructions below split into the work order sections accompanied by lots of photos to guide you through this simple style of finish please read through before plugging the iron in ;)
NB. I know...caught out, tut tut naughty me ;-) that you can see the thread dragged between the smyrna snowflakes floating in the sky on my reverse, but honestly this linen is as thick as sack cloth, I thought I could cheat and get away with it with this linen... totally forgetting this was going to be seen by the world!! So please excuse and overlook my tardiness on this occasion.. however on the plus side...lol...they will stay put, nice and secure over time and they do look alot worse on these pics!
Without further more ado on we go... just remember have fun and enjoy your creation!!
Section 1
PREPARING THE STITCHED SECTION
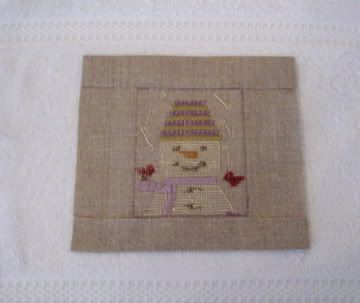
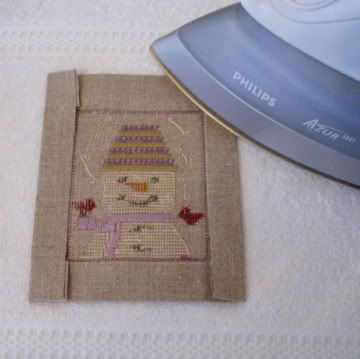
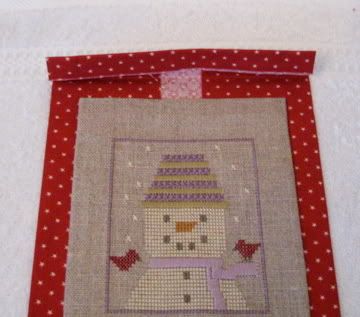
Step 1. Press with iron the whole reverse side of stitched piece so it is nice and flat. Now remember our 2 inch/5cm allowance all around the design we are now going to 'finger' press after measuring the top and bottom a 1 inch (2.5cm) turnover to wrong side of stitched piece. It will turn into exactly the outer edge of the outline border crosses, it should look like this below.
Step 2. Do the same for the 2 sides remembering we are working on the reverse side all the time.
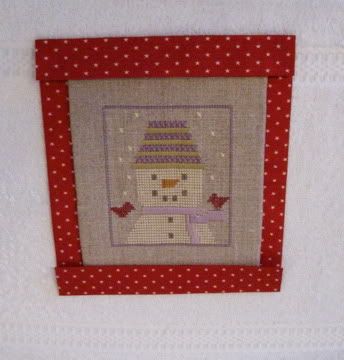
Step 3. Now press it into place on the reverse side, remember ;)
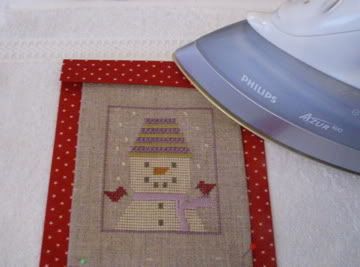
Step 4. Cut Iron On Vilene/fusible Interfacing to exact size of the now ironed stitched piece.

Step 5. On
REVERSE side shown above now iron vilene/interfacing on as per manufacturers instructions to fuse to the back of stitched piece.

Section 2
PREPARING THE BACKING FABRIC
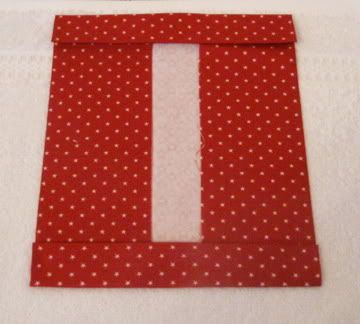
Step 6. We now start the backing fabric measure and fold sides in like this by 'finger' pressing.
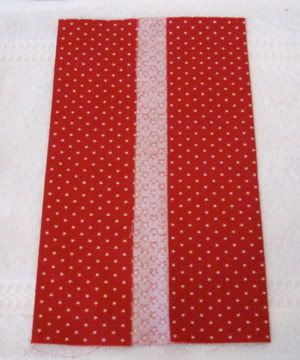
Step 7. Try the stitched design on top for size, like this below, measure distances accurately, remove stitched piece then iron backing fabric into place. (Use steam setting if you have it to get really sharp lines)
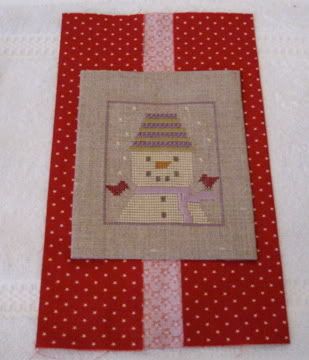
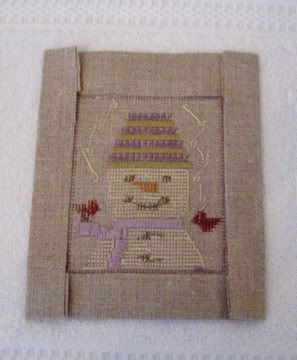
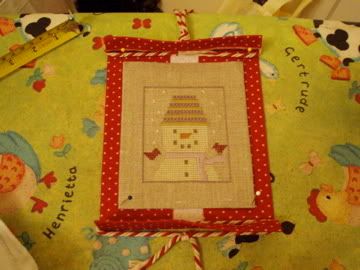
Step 8. Making sure after measuring that the stitched piece is correctly centred, hold into place with a couple of pins pushed in vertically. We are now going to turn the top over like this, measuring to use about one third of the fabric for the 1 st turnover then 'finger' press into place like so...
Step 9. We are now going to use another third and turn the top over again making sure it sits over the top of the stitched piece like so
Step 10. Now we know everything is lined up properly, press it into place being careful not to iron over your stitching.
Step 11. We now do exactly the same for the bottom section following steps 8 to 10 above. It will now look like this below.
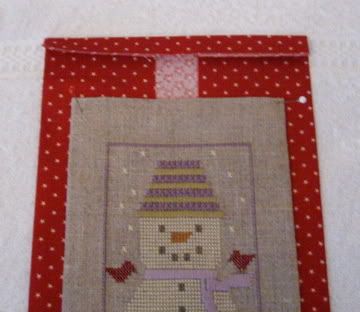
Step 12. If your prepared stitched piece is quite light you may not need to do this step. Mine was a very thick heavy linen and the backing fabric needed more strength to hold it firm. Judge yourself if there seems a big weight difference in the 2 prepared sections. If yours does need strengthening to keep it firm we are now going to repeat Step 4 for the iron on Vilene/fusible interfacing to be exact size of now ironed backing fabric piece. This time though we will open up the ironed backing fabric , line up the Vilene/Interfacing within the ironed outline and again as per manufacturers instructions iron it into place on
WRONG side BEING VERY CAREFUL NOT TO PRESS OUT YOUR CAREFULLY IRONED IN LINES. The backing fabric now looks like this below once you have folded in the top, bottom and sides again.
Section 3
CORDING PREPARATION
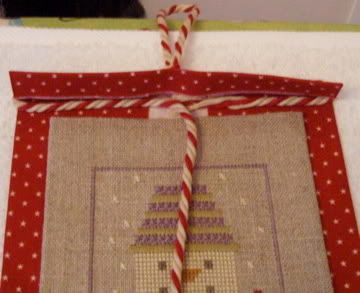
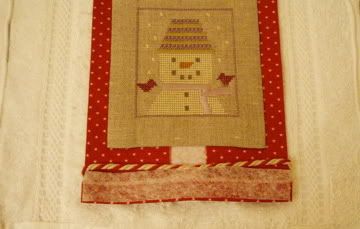
Step 13. Take your length of cording and knot a loop in it a little way along. This will form the hanger, centre it in the middle top then take the remaining cording round snugly to fit in under the flap.
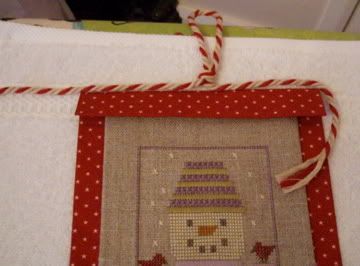
Step 14. Do the same with the other side of cording long length. Once in position cut it off from the main long length, leaving it just slightly longer than exact. If you untwist a small bit of the cording you can take a little section to make a small knot to hold it when it hangs with the weight from it. (Only use a little bit of cording from each side to knot, or it will be too bulky). Those of you who can/want to sew, can oversew the pieces of cording together. I tried doing nothing but it just fell out of mine with the weight once I hung it up :/
OR: Maybe a better way?...You can always do it way of the bottom instruction below (Step 15) but leave the ends long enough to knot at the top to form the hanger.
Step 15. We are going to do the bottom now but the other way around by placing the cording under the flap first then bringing it around to the bottom of the fabric.
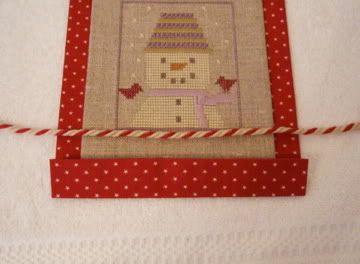
Step 16. Tie at the bottom in a knot, it will have maybe untwisted a bit itself. No worries, we will come to that later :)
Section 4
FINAL FINISHING
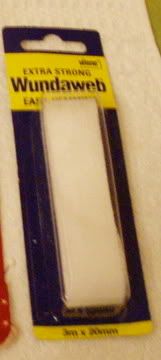
Step 17. We are on the last leg now of fixing it all together, all the careful preparation will pay off :) We are now going to cut the strips of Iron on Wonderweb / Fusible web / Hemming Tape. Very carefully and accurately cut the strips the exact length and width of the sides of the STITCHED piece as shown here. So you end up with 4 pieces clockwise all round the edge...one each side and top & bottom.
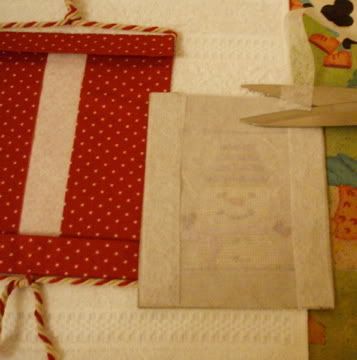
Step 18. Very carefully to make sure all the web / tape is accuarately lined up turn it all over and place it on the top of the backing piece. Once correctly centred vertically pin it into place to hold...the big moment is coming up as you will now follow the manufacturers instructions and fuse it into place with your iron :) It will now look like this below.
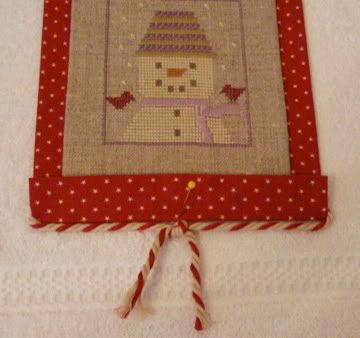
Step 19. This is the last step and we are going to fuse the overlap flap with the web / tape to form a sealed casing. Again cut the strips exactly the right width, of the flap this time. Make sure the cording is correctly in place top and bottom then push the flap down/up repectively and iron again as per manufacturers instructions. This will attach the top and bottom sections to the stitched piece . Separate to unravel the bottom ends of the twisted cording to form a tassel, trim if necessary to make it look neater.
Those of you who can or like to sew can of course do so invisibly right round the whole edges.

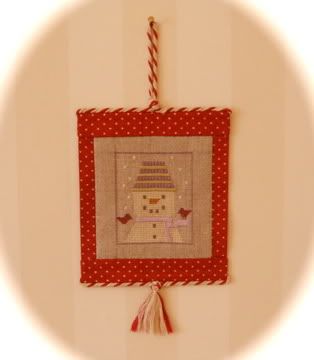
Which ever way you prefer VOILA we have our finished wallhanging :)
I hope you have understood and enjoyed my tutorial for you all, happy creating and finishing :-)))
Helen